作成中
Pinpoint は、NAVERが開発・オープンソース化(Apache License 2.0)している大規模分散システム向けの APM(Application Performance Management:アプリケーション性能管理) および分散トレーシングツールです。Googleの「Dapper」論文にインスピレーションを受けて設計されています。
主な特徴
コードレベルの可視性: CallStack(コールスタック)機能により、分散システムをまたぐトランザクションの処理やメソッド単位の遅延時間を詳細に把握できます。
トポロジーの自動検出: ServerMap を通じて、サーバー間の接続関係や通信フローをリアルタイムに視覚化します。
ゼロコード・エージェント・インストール: アプリケーションのコードを変更することなく、Java、PHP、Pythonなどのエージェントを組み込んで監視が可能です。
低オーバーヘッド: システムへの負荷が少なく、リソース消費を約3%程度に抑えます。
主要コンポーネント: Collector、Web、Agent の3つの主要コンポーネントで構成され、データストレージには Apache HBase(または関連ストレージ)を使用します。
詳細なドキュメントやソースコードは Pinpoint 公式サイト または Pinpoint GitHubリポジトリ から確認できます。
ここでは、dockerを使って環境を構築します。コードは以下の物を使わせて頂きますhttps://github.com/pinpoint-apm/pinpoint-docker。
dockerのバージョンは上記サイトにある様に、18.02.0以上である必要があります。
サーバ側の設定
dockerを使ったアプリの構築
バージョン 4.0.0での変更の反映漏れの為docker-compose.ymlを修正します。
% git clone https://github.com/pinpoint-apm/pinpoint-docker.git
% cd pinpoint-docker
% cp -p docker-compose.yml docker-compose.yml.org
% vi docker-compose.yml
% diff docker-compose.yml docker-compose.yml.org
24,25c24,25
<       - ./hbase_data:/home/pinpoint/hbase:Z
<       - ./zookeeeper_data:/home/pinpoint/zookeeper:Z
---
>       - hbase_data:/home/pinpoint/hbase
>       - /home/pinpoint/zookeeper
53d52
<             curl -SL "https://raw.githubusercontent.com/pinpoint-apm/pinpoint/${PINPOINT_VERSION}/service-module/src/main/resources/sql/Service-Schema.sql" -o /docker-entrypoint-initdb.d/Service-Schema.sql &&
56d54
<       sed -i '/^--/d' /docker-entrypoint-initdb.d/Service-Schema.sql &&
69c67
<       - ./mysql_data:/var/lib/mysql:Z
---
>       - mysql_data:/var/lib/mysql
171c169
<       - ./data-volume:/pinpoint-agent:Z
---
>       - data-volume:/pinpoint-agent
230c228
<       - ./data-volume:/pinpoint-agent:Z
---
> - data-volume:/pinpoint-agent※上記設定で、mysqlに以下のようなserviceというテーブルが作成されます。
※あと、永続化ボリュームをdocker-compose.ymlと同じパス如何に作成するように変更しています。これは実施しなくても大丈夫です。動作には影響しません
# docker compose exec -u admin pinpoint-mysql /bin/bash
bash-5.1# mysql -u admin -p
mysql> use pinpoint

# crulで追加した行で実行されるSQL
CREATE TABLE IF NOT EXISTS `service` (
  `uid` VARCHAR(32) NOT NULL,
  `name` VARCHAR(255) NOT NULL,
  PRIMARY KEY (`uid`),
  UNIQUE KEY `ux_service_name` (`name`)
) ENGINE=InnoDB DEFAULT CHARSET=utf8mb4;docker-composeを用いて起動しますdocker-composeのバージョンは
% docker-compose up -d
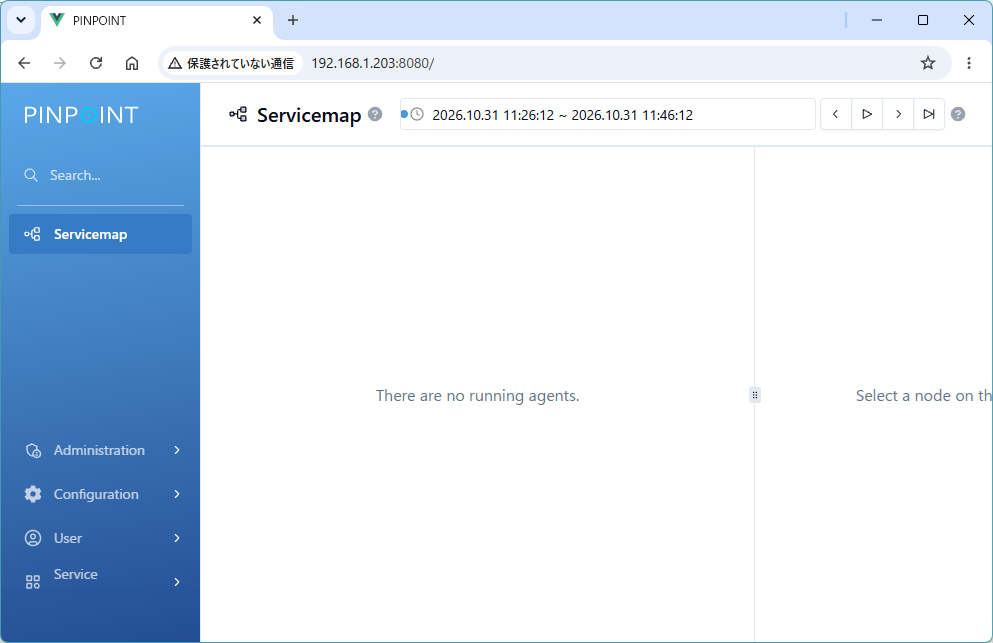
起動後、以下の通りWEBアクセスが可能です。(以下は別PC(192.168.1.203)で起動した例です。おなじPCの場合は http://localhost:8080/ で大丈夫です。)
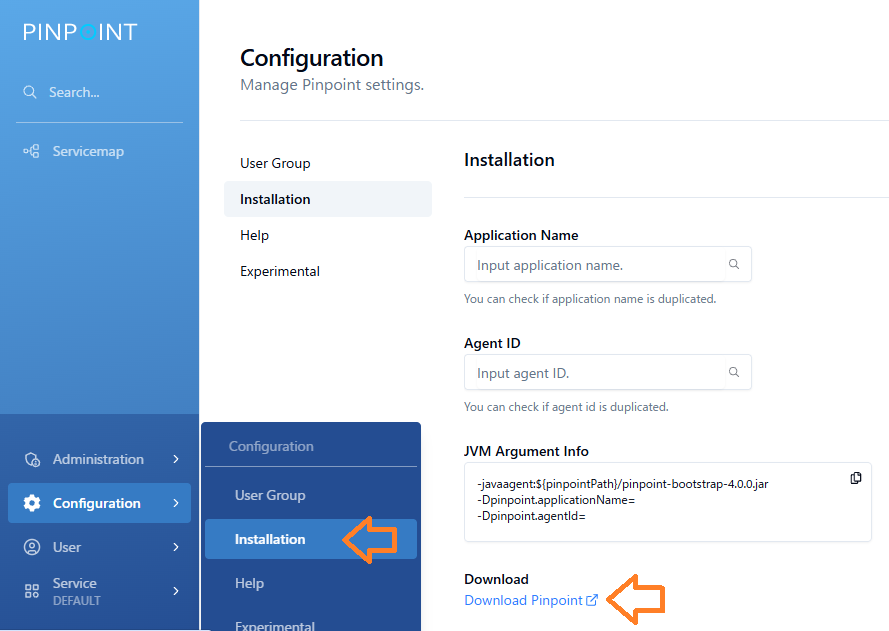
Serviceの作成
Agentのダウンロード
アプリ側の設定
ここでは既に構築済のSpring Bootなアプリ上に設定します。
Agentの設定
プロジェクトホルダ以下にある .vscode/launch.json に agentファイルを設定します。
今回私の環境では、D:\work\springTest\demo\.vscode\launch.json にありましてそのファイルに、"vmArgs"を追加しています。で、どうもサーバ側のcollectorがv4に対応していないようなので、pinpoint-agent-4.0.0.jar ではなくpinpoint-agent.jarを使います。
{
    "configurations": [
        {
            "type": "java",
            "name": "Spring Boot-SpringStart12Application<demo>",
            "request": "launch",
            "cwd": "${workspaceFolder}",
            "mainClass": "com.example.demo.SpringStart12Application",
            "projectName": "demo",
            "args": "",
            "vmArgs": "-javaagent:D:/work/springTest/pinpoint-agent-4.0.0/pinpoint-bootstrap.jar -Dpinpoint.applicationName=my-app -Dpinpoint.serviceName=my-app -Dpinpoint.agentId=my-app-01",
            "envFile": "${workspaceFolder}/.env"
        }
    ]
}「my-app」などの値ですが、サーバと合わせる必要があります。v4.0.0から、pinpoint.serivceNameが必要になったようです。
Agentのコンフィグの設定
利用するAgentが何処に情報を送るのかを以下の設定ファイルで設定
設定ファイルはAgentの pinpoint-bootstrap-4.0.0.jar と同じホルダ内にあるファイル D:\download\pinpoint-agent-4.0.0\pinpoint-agent-4.0.0\pinpoint-root.config の 以下の箇所を変更する。versionはv4からv1に変更しています。後、ipは、pinpointのcollectorが起動しているサーバのIPアドレスを設定します。
pinpoint.modules.uid.version=v1
profiler.transport.grpc.collector.ip=192.168.1.203
profiler.transport.grpc.agent.collector.ip=192.168.1.203コレクター(親サーバー)接続設定
エージェントが収集したデータを送信する先(Pinpoint Collector)を指定する最も重要なオプションです。
profiler.transport.grpc.collector.ip- 主に「トレースデータ(ユーザーのリクエストがどう処理されたか)」や「システムメトリクス(CPUやメモリの状況)」を送信するための接続先です。
profiler.transport.grpc.agent.collector.ip- 主に「エージェント自身の起動・停止ステータス」や「アプリケーションのメタデータ(クラスやメソッドの情報)」を管理するための接続先です。
profiler.transport.grpc.agent.collector.port- 概要: エージェント情報を送るための TCP ポート番号を指定します(デフォルト:
9991)。
- 概要: エージェント情報を送るための TCP ポート番号を指定します(デフォルト:
profiler.transport.grpc.metadata.collector.port- 概要: メタデータを送るための TCP ポート番号を指定します(デフォルト:
9991)。
- 概要: メタデータを送るための TCP ポート番号を指定します(デフォルト:
サンプリング(トレース抽出)設定
すべてのリクエストを監視すると負荷が高くなるため、抽出割合を調整するオプションです。
profiler.sampling.rate- 概要: トレースを採取するサンプリングレートを指定します。
- 補足: リリースバイナリのデフォルト値は
20(20回に1回トレースする)になっていることが多く、1に変更するとすべてのトランザクション(100%)を追跡できるようになります。
コンテナ環境・識別設定
Docker などのマルチインスタンス環境や、特定の実行環境でエージェントを識別させるためのオプションです。
-Dpinpoint.container(Java VMの引数フラグ)- 概要: エージェントをコンテナ(Docker 等)環境内で起動していることを明示するフラグです。
- 効果: 異なるコンテナ ID を持っていても、同じサービスとして重複を避け正しくコレクター側に認識させることができます。
Springアプリの起動
以下は私の環境にあった勉強中のコードを使って立ち上げたものです。
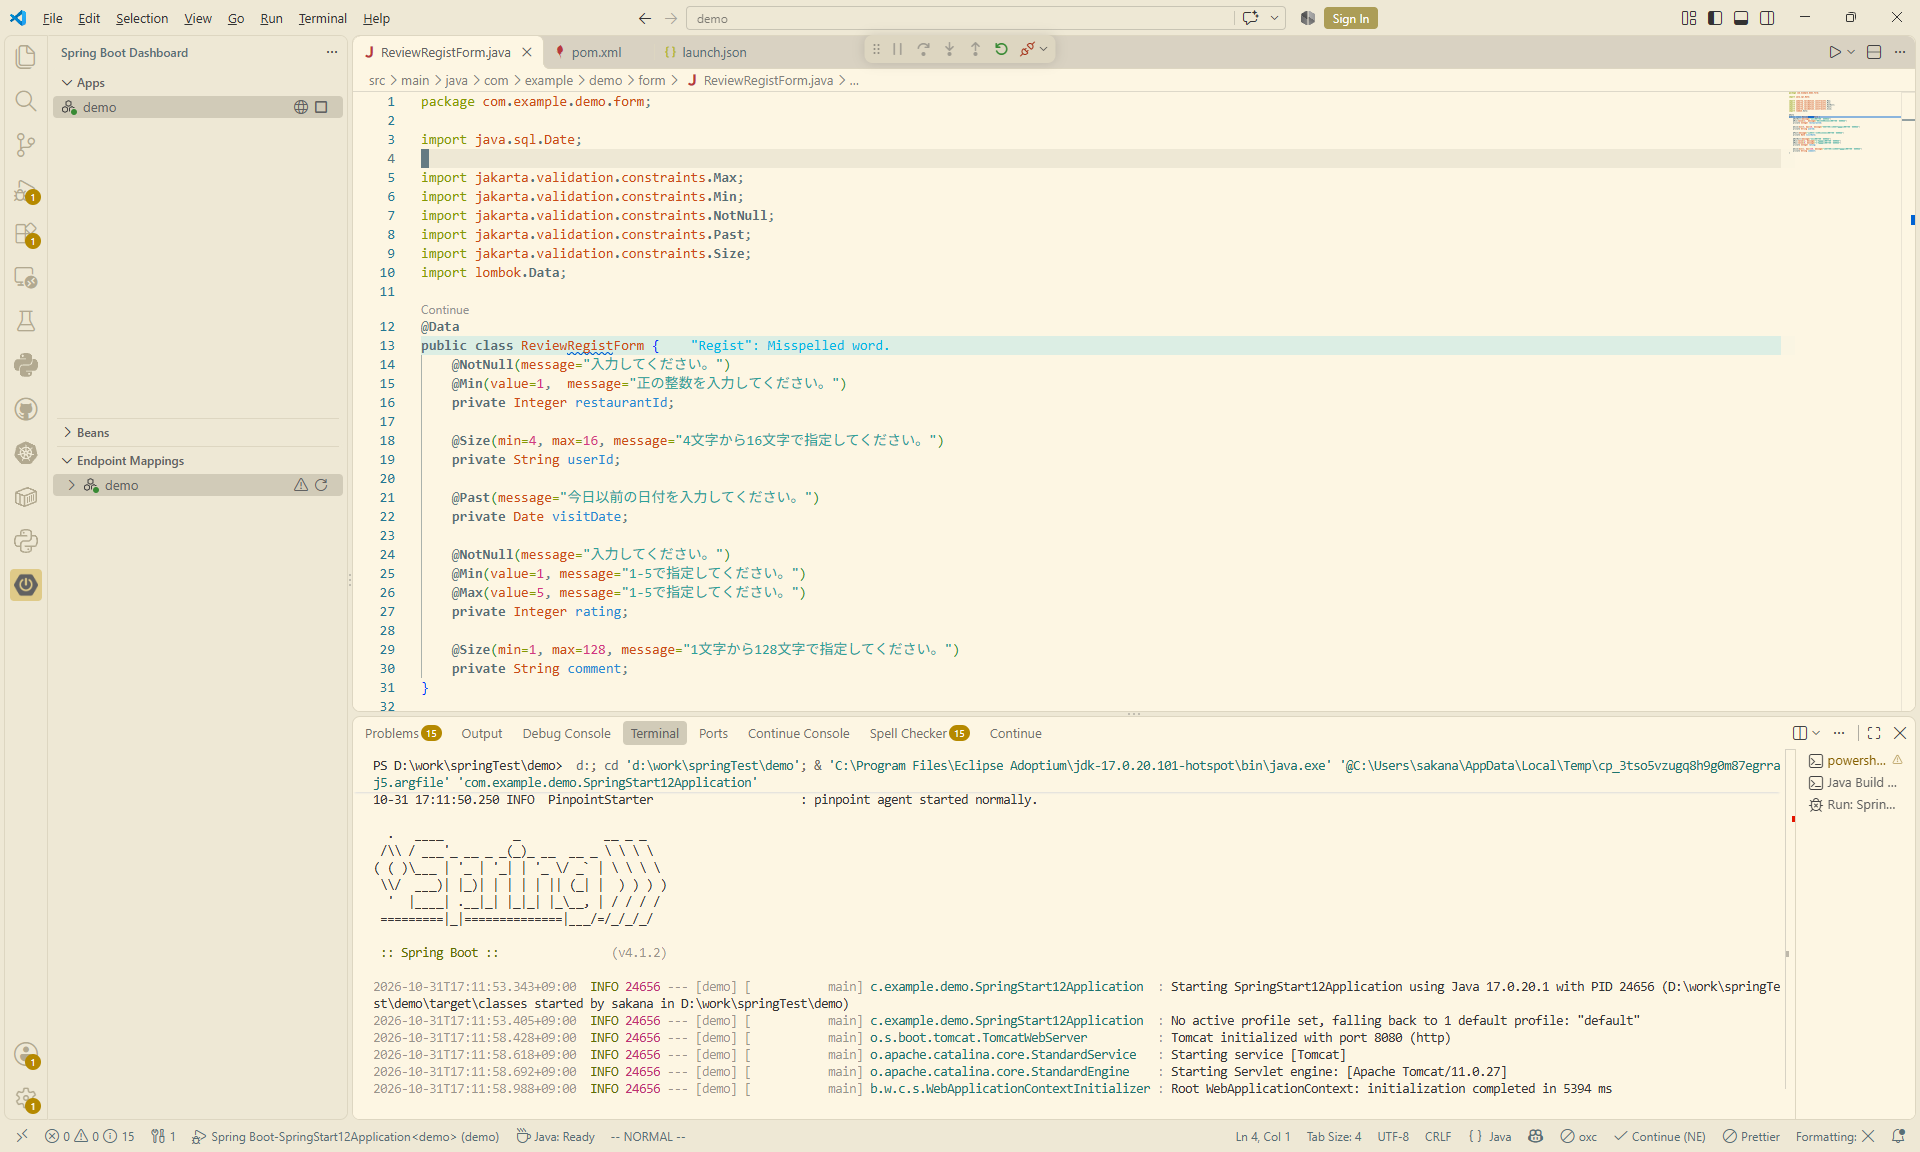
動作確認
Pinpointの画面
私の環境ではpinpointを立ち上げているサーバは192.168.1.203なので、 http://192.168.1.203:8080/ にアクセスするとWEBの画面を確認することが出来ます。
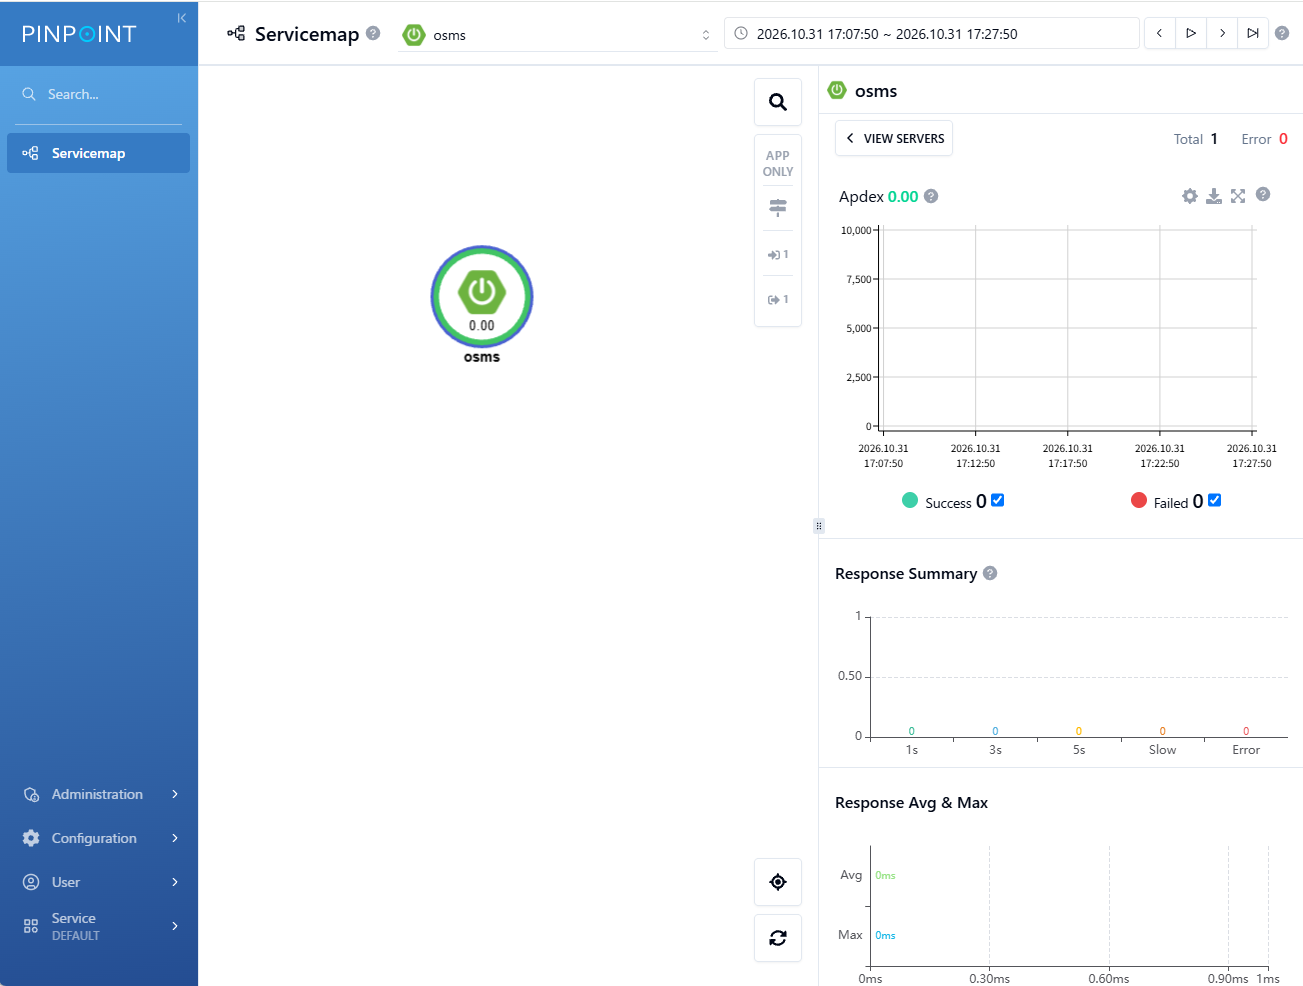
メトリクスも一緒に起動
pinpoint v4.0.0 の互換性より、gitで取得したdocker-compose.ymlと、docker-compose-metrics.ymlのimage: で指定されたコンテナのバージョンが問題となります。
telegrafの修正
% diff docker-compose-metric.yml.20261101 docker-compose-metric.yml
237,241c237,239
<     entrypoint: >
<       sh -c "
<       curl https://raw.githubusercontent.com/pinpoint-apm/pinpoint/${PINPOINT_VERSION}/metric-module/metric/src/main/telegraf/pinpoint-telegraf.conf > telegraf.conf &&
<       sed -i 's/127.0.0.1/pinpoint-collector/g' telegraf.conf &&
<       telegraf -config telegraf.conf"
---
>     volumes:
>       - ./telegraf_data/telegraf.conf:/etc/telegraf/telegraf.conf:Z
>     command: telegraf

% mkdir telegraf_data
% vi telegraf_data/telegraf.conf
[agent]
  interval = "1s"
  round_interval = true
  metric_batch_size = 1000
  metric_buffer_limit = 10000
  collection_jitter = "0s"
  flush_interval = "1s"
  flush_jitter = "0s"
  precision = ""
  hostname = ""
  omit_hostname = false

[[outputs.http]]
  url = "http://pinpoint-collector:9113/telegraf"
  timeout = "5s"
  method = "POST"
  data_format = "influx"

[[inputs.cpu]]
  percpu = true
  totalcpu = true
  collect_cpu_time = false
report_active = falsekafkaのトピック作成
% docker compose exec pinpoint-kafka /bin/bash
% kafka-topics.sh --create --bootstrap-server localhost:9092 --replication-factor 1 --partitions 1 --topic pinpointpinotの修正
pinotのバージョン変更
% sed -i 's|apachepinot/pinot:1.0.0-11-amazoncorretto|apachepinot/pinot:1.3.0|g' ./docker-compose-metric.ymlサンプルを使ったスキーマとテーブルの設定
% docker compose exec pinot-controller_1 sh
% cd /opt/pinot/conf

スキーマの作成
% cat sample_schema.json
{
  "metricFieldSpecs": [
    {
      "dataType": "FLOAT",
      "name": "percent"
    }
  ],
  "dimensionFieldSpecs": [
    {
      "dataType": "STRING",
      "name": "dim1"
    },
    {
      "dataType": "STRING",
      "singleValueField": false,
      "name": "dim2"
    }
  ],
  "timeFieldSpec": {
    "incomingGranularitySpec": {
      "timeType": "DAYS",
      "dataType": "LONG",
      "name": "incomingName"
    },
    "outgoingGranularitySpec": {
      "timeType": "DAYS",
      "dataType": "LONG",
      "name": "outgoingName"
    }
  },
  "schemaName": "schemaName"
}
% curl -X POST -H "Content-Type: application/json" \
  -d @sample_schema.json http://localhost:9000/schema
% curl -X GET "http://localhost:9000/schemas"
["inspectorStatAgent00","inspectorStatApp","schemaName"]

オフラインテーブルの作成
% cat sample_offline_table_config.json
{
  "tableName": "sampleTable",
  "tableType": "OFFLINE",
  "segmentsConfig": {
    "timeColumnName": "outgoingName",
    "timeType": "DAYS",
    "retentionTimeUnit": "DAYS",
    "retentionTimeValue": "365",
    "segmentPushType": "APPEND",
    "segmentAssignmentStrategy": "BalanceNumSegmentAssignmentStrategy",
    "replication": "3"
  },
  "tenants": {
    "broker": "pinpoint",
    "server": "pinpoint"
  },
  "tableIndexConfig": {
    "loadMode": "HEAP",
    "invertedIndexColumns": [
      "column1",
      "column2"
    ]
  },
  "metadata": {
    "customConfigs": {
    }
  }
}
% curl -X POST -H "Content-Type: application/json" \
  -d @sample_offline_table_config.json http://localhost:9000/tables
% curl -X GET "http://localhost:9000/tables"
{"tables":["inspectorStatAgent00","inspectorStatApp","sampleTable"]}

リアルタイムテーブルの作成
% cat sample_realtime_table_config.json
{
  "tableName": "sampleTable",
  "tableType": "REALTIME",
  "segmentsConfig": {
    "timeColumnName": "outgoingName",
    "timeType": "DAYS",
    "retentionTimeUnit": "DAYS",
    "retentionTimeValue": "5",
    "segmentPushType": "APPEND",
    "segmentAssignmentStrategy": "BalanceNumSegmentAssignmentStrategy",
    "schemaName": "schemaName",
    "replication": "3",
    "replicasPerPartition": "1"
  },
  "tenants": {
    "broker": "pinpoint",
    "server": "pinpoint"
  },
  "tableIndexConfig": {
    "loadMode": "HEAP",
    "invertedIndexColumns": [],
    "streamConfigs": {
      "streamType": "kafka",
      "stream.kafka.consumer.type": "lowLevel",
      "stream.kafka.topic.name": "kafkaTopicName",
      "stream.kafka.decoder.class.name": "org.apache.pinot.plugin.stream.kafka.KafkaJSONMessageDecoder",
      "stream.kafka.consumer.factory.class.name": "org.apache.pinot.plugin.stream.kafka20.KafkaConsumerFactory",
      "stream.kafka.consumer.prop.auto.offset.reset": "largest",
      "stream.kafka.broker.list": "pinpoint-kafka:9092",
      "realtime.segment.flush.threshold.time": "12h",
      "realtime.segment.flush.threshold.size": "100M"
    }
  },
  "metadata": {
    "customConfigs": {
    }
  }
}
% curl -X POST -H "Content-Type: application/json" \
  -d @sample_realtime_table_config.json http://localhost:9000/tables
% curl -X GET "http://localhost:9000/tables"
{"tables":["inspectorStatAgent00","inspectorStatApp","sampleTable"]}起動
% docker compose down
% docker compose -f docker-compose.yml -f docker-compose-metric.yml up -dHBaseの確認
Web画面での動作確認 (http://192.168.1.203:16010/ ) ※URLの192.168.1.203の箇所は皆さんの環境に合わせて変更してください。
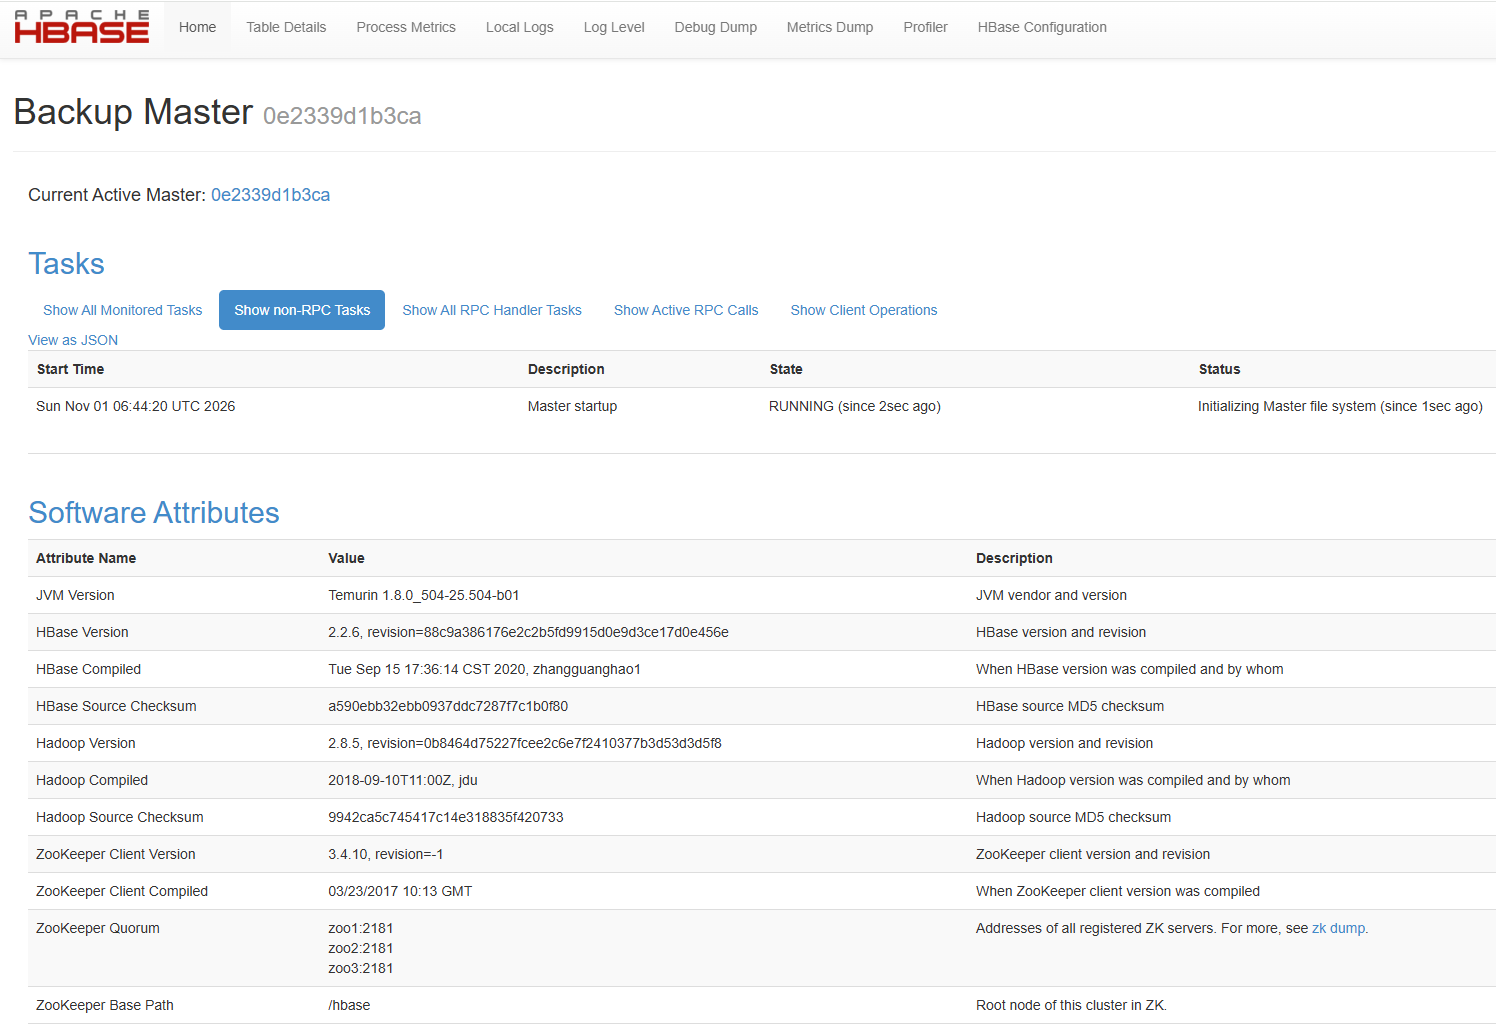
pinot(ピーノ)の確認
pinot-controllerで実行。
一覧表示
% curl -X GET http://localhost:9000/schemas
% curl -X GET http://localhost:9000/tables
% curl -X GET http://localhost:9000/tenants

スキーマの削除
% curl -X DELETE "http://localhost:9000/schemas/sampleTable"

テーブルの削除
% curl -X DELETE "http://localhost:9000/tables/sampleTable?type=REALTIME"
% curl -X DELETE "http://localhost:9000/tables/sampleTable?type=OFFLINE"

テナントの登録
% curl -X POST -H "Content-Type: application/json" \
  -d @sample_broker_tenant.json http://localhost:9000/tenants
% curl -X POST -H "Content-Type: application/json" \
  -d @sample_server_tenant.json http://localhost:9000/tenants

スキーマの登録
% curl -X POST -H "Content-Type: application/json" \
  -d @sample_schema.json http://localhost:9000/schemas

テーブルの登録
% curl -X POST -H "Content-Type: application/json" \
  -d @sample_offline_table_config.json http://localhost:9000/tables
% curl -X POST -H "Content-Type: application/json" \
-d @sample_realtime_table_config.json http://localhost:9000/tablesCompatibility
Java version required to run Pinpoint:
| Pinpoint Version | Agent | Collector | Web | Batch |
|---|---|---|---|---|
| 2.0.x | 6-13 | 8 | 8 | 8 |
| 2.1.x | 6-14 | 8 | 8 | 8 |
| 2.2.x | 7-14 | 8 | 8 | 8 |
| 2.3.x | 7-17 | 8 | 8 | 8 |
| 2.4.x | 7-18 | 11 | 11 | 11 |
| 2.5.x | 8-19 | 11 | 11 | 11 |
| 3.0.x | 8-21 | 17 | 17 | 17 |
| 3.1.x | 8-25 | 17 | 17 | 17 |
| 4.0.x | 8-25 | 17 | 17 | 17 |
HBase compatibility table:
| Pinpoint Version | HBase 1.x | HBase 2.x |
|---|---|---|
| 2.0.x - 2.2.x | yes | optional |
| 2.3.x - 2.5.x | yes | hbase2-module |
| 3.0.x | no | yes |
| 3.1.x | no | yes |
| 4.0.x | no | yes |
Agent - Collector compatibility table:
| Agent Version | Collector 2.x.x | Collector 3.0.x | Collector 3.1.x | Collector 4.0.x |
|---|---|---|---|---|
| 2.x.x | yes | yes | yes | yes |
| 3.0.x | no | yes | yes | yes |
| 3.1.x | no | no | yes | yes |
| 4.0.x | no | no | no | yes |
Pinot compatibility table:
| Pinpoint Version | Pinot 0.11.0 | Pinot 0.12.0 | Pinot 1.0.0 | Pinot 1.2.0 | Pinot 1.3.0 | Pinot 1.5.0 |
|---|---|---|---|---|---|---|
| 2.5.x | yes | yes | yes | yes | yes | - |
| 3.0.x | no | no | yes | yes | yes | - |
| 3.1.x | no | no | no | no | yes | - |
| 4.0.x | no | no | no | no | no | yes |
(未完成) pinpoint-4.0.0をソースからビルドする場合
dockerを使わない方法。まだうまく起動まで行けてません…
Firewalldの設定
% firewall-cmd --zone=public --add-port=8080/tcp --permanent
% firewall-cmd --zone=public --add-port=8082/tcp --permanent
% firewall-cmd --zone=public --add-port=8099/tcp --permanent
% firewall-cmd --zone=public --add-port=9000/tcp --permanent
% firewall-cmd --zone=public --add-port=9991/tcp --permanent
% firewall-cmd --zone=public --add-port=9992/tcp --permanent
% firewall-cmd --zone=public --add-port=9993/tcp --permanent
% firewall-cmd --zone=public --add-port=16010/tcp --permanent
% firewall-cmd --reload
Javaの設定
Javaの環境が必要なのでインストールする (8,11,17の3つ必要…)
% dnf install ttmkfdir xorg-x11-fonts-Type1
% dnf install java-1.8.0-openjdk.x86_64 java-1.8.0-openjdk-devel.x86_64
% dnf install java-1.8.0-openjdk-headless.x86_64
% dnf install java-11-openjdk.x86_64 java-11-openjdk-devel.x86_64
% dnf install java-11-openjdk-headless.x86_64 java-11-openjdk-static-libs.x86_64
% dnf install java-17-openjdk.x86_64 java-17-openjdk-headless
% dnf install java-17-openjdk-devel.x86_64 java-17-openjdk-static-libs.x86_64

% cat - >> ~/.bashrc
export PATH="/usr/lib/jvm/java-17-openjdk-17.0.21.0.9-2.1.el8.x86_64/bin/;$PATH"
export JAVA_8_HOME=/usr/lib/jvm/java-1.8.0-openjdk-1.8.0.504.b01-1.1.el8.x86_64
export JAVA_11_HOME=/usr/lib/jvm/java-11-openjdk-11.0.25.0.9-2.el8.x86_64
export JAVA_17_HOME=/usr/lib/jvm/java-17-openjdk-17.0.21.0.9-2.1.el8.x86_64
export JAVA_HOME=/usr/lib/jvm/java-17-openjdk-17.0.21.0.9-2.1.el8.x86_64
^D

% source ~/.bashrcpinpointのビルド
% mkdir ~/src
% cd ~/src
% wget https://github.com/pinpoint-apm/pinpoint/archive/refs/tags/v4.0.0.tar.gz
% gzip -dc v4.0.0.tar.gz | tar xf -
% cd pinpoint-4.0.0

Gitにつなぎに行けずmvnwがFailするんでSkip対象になるように以下を修正
% diff pom.xml.org pom.xml
2095a2096
>                             <skip>true</skip>
((venv) ) [root@rhel8 pinpoint-4.0.0]# diff -c pom.xml.org pom.xml
*** pom.xml.org 2026-10-28 05:46:33.000000000 -0400
--- pom.xml     2026-10-31 20:37:18.148904571 -0400
***************
*** 2093,2098 ****
--- 2093,2099 ----
                          <phase>initialize</phase>
                          <inherited>false</inherited>
                          <configuration>
+                             <skip>true</skip>
                              <executable>git</executable>
                              <arguments>
                                  <argument>submodule</argument>


grpc-idlが空っぽなのでmvnw時エラーで止まるので取得しておく
% mkdir ./tmp
% cd ./tmp
% git clone https://github.com/pinpoint-apm/pinpoint-grpc-idl.git
% cd pinpoint-grpc-idl
% tar cf - . | ( cd ../../grpc/grpc-idl ; tar xf - )

% cd ~/src/pinpoint-4.0.0
% ./mvnw install -Prelease -DskipTests=trueHBaseのインストールと起動
本番運用においてはHadoop(特にHDFSとZooKeeper)が必要です。 ただし、テストや開発目的であれば、Hadoopなしで単体で動かすことが可能です。
動作モード別の必要性
| 動作モード | Hadoop(HDFS) の必要性 | 主な用途・特徴 |
|---|---|---|
| スタンドアロンモード (Standalone Mode) | 不要 | ローカル開発・テスト用 データはHDFSではなく、ローカルのファイルシステム(Linuxのローカルディレクトリなど)に保存されます。Hadoopの構築が不要なため、手軽にHBaseを試せます。 |
| 分散モード (Distributed Mode) | 必須 | 本番運用・ステージング環境 大量のデータを複数のサーバーに分散して保存し、高速に処理・冗長化するために、ストレージ基盤としてHDFSが絶対に必要となります。 |
なぜ本番環境ではHadoop(HDFS)が必要なのか?
- データの永続性と冗長性: HBase自体はデータをメモリ(MemStore)に書き込んだ後、定期的にファイル(HFile)に書き出します。このHFileを安全に分散・レプリケーション(複製)して保存する役割をHDFSが担っています。
- スケーラビリティ: データ量が増えた際に、Hadoopの仕組みを利用してサーバーを横に並べる(スケールアウトする)ことで、ペタバイト級のデータに対応できるようになります。
環境構築
% wget https://dlcdn.apache.org/hbase/2.6.7/hbase-2.6.7-bin.tar.gz
% gzip -dc hbase-2.6.7-bin.tar.gz | tar xf -
% cd hbase-2.6.7
% cd hbase-2.6.7/bin
% ./start-hbase.sh
% ./hbase shell /root/src/pinpoint-4.0.0/hbase/scripts/hbase-create.hbaseHBaseの動作確認
プロセスの状態を確認する
% jps
2908365 Jps
2907892 HMaster

※ HMaster:HBaseのマスターサーバー(プライマリ/セカンダリ)で表示されます。
※ HRegionServer:スレーブ(RegionServer)側で表示されます。

HBaseシェルモード
% hbase shell

テーブルの一覧表示
hbase:001:0> list

データの確認
hbase:001:0> scan 'テーブル名'

特定のキーのデータを取得
hbase:001:0> get 'テーブル名', 'row_key'Web画面での動作確認 (http://localhost:16010/ )
Pinot(ピーノ)のインストールと起動
Pinotのリソース要求として8CPU、16GB
kafkaの設定
% cd /root/src/
% gzip -dc kafka_2.13-4.4.0.tgz | tar xf -
% cd kafka_2.13-4.4.0
% KAFKA_CLUSTER_ID="$(bin/kafka-storage.sh random-uuid)"
% bin/kafka-storage.sh format --standalone -t $KAFKA_CLUSTER_ID -c config/server.properties
% bin/kafka-server-start.sh config/server.properties &

トピックを作成して確認してみる
% bin/kafka-topics.sh --create --topic quickstart-events --bootstrap-server localhost:9092
% bin/kafka-topics.sh --describe --topic quickstart-events --bootstrap-server localhost:9092
Topic: quickstart-events        TopicId: UcWSB9U6T0aZqgeNRrfemA PartitionCount: 1       ReplicationFactor: 1    Configs: min.insync.replicas=1,segment.bytes=1073741824
        Topic: quickstart-events        Partition: 0    Leader: 1       Replicas: 1     Isr: 1  Elr:    LastKnownElr:

% bin/kafka-console-producer.sh --topic quickstart-events --bootstrap-server localhost:9092
>This is my first event
>This is my second event
^D

% bin/kafka-console-consumer.sh --topic quickstart-events --from-beginning --bootstrap-server localhost:9092
<snip>
This is my first event
This is my second event
^C
詳しい動作については、こちら がとても参考になると思います。
Pinotの設定
% wget https://apachepinot.gateway.scarf.sh/pinot/1.5.1/apache-pinot-1.5.1-bin.tar.gz
% gzip -dc apache-pinot-1.5.1-bin.tar.gz | tar xf -
% mv apache-pinot-1.5.1-bin.tar.gz pinot-1.5.1
% cd pinot-1.5.1
% mkdir ./tmp
% ./bin/pinot-admin.sh QuickStart -type batch -dataDir ./tmp/pinot-quick-start
% mariadbの設定
% dnf install mariadb-connector-c.x86_64 mariadb-connector-odbc.x86_64 mariadb-embedded.x86_64 mariadb-java-client.noarch mariadb-server.x86_64 mariadb-server-utils.x86_64 mariadb-common.x86_64 mariadb-gssapi-server.x86_64 mariadb.x86_64 mariadb-errmsg mariadb-backup
% systemctl start mariadb
% systemctl status mariadb
% mysql_secure_installation
 rootのパスワードの設定と、その他はすべてデフォルトの「Y」で良いと思う

% mysql -u root -p
% vi /etc/my.cnf.d/mariadb-server.cnf
[mariadb]
character-set-server = utf8mb4

% vi /etc/my.cnf.d/client.cnf
[client-mariadb]
default-character-set = utf8mb4

% sudo systemctl restart mariadb

% mysql -u root -p
mysql>  CREATE DATABASE pinpoint DEFAULT CHARACTER SET utf8mb4 COLLATE utf8mb4_general_ci;
mysql>  CREATE USER 'pinpoint_user'@'localhost' IDENTIFIED BY 'admin123';
mysql>  GRANT ALL PRIVILEGES ON pinpoint.* TO 'pinpoint_user'@'127.0.0.1' IDENTIFIED BY 'admin123';
mysql>  GRANT ALL PRIVILEGES ON pinpoint.* TO 'pinpoint_user'@'localhost' IDENTIFIED BY 'admin123';
mysql>  FLUSH PRIVILEGES;

mysql> use pinpoint

# crulで追加した行で実行されるSQL
CREATE TABLE IF NOT EXISTS `service` (
  `uid` VARCHAR(32) NOT NULL,
  `name` VARCHAR(255) NOT NULL,
  PRIMARY KEY (`uid`),
  UNIQUE KEY `ux_service_name` (`name`)
) ENGINE=InnoDB DEFAULT CHARSET=utf8mb4;pinpoint-collectorの起動
% cd ~/src/pinpoint-4.0.0/collector/target/deploy
% /usr/lib/jvm/java-17-openjdk-17.0.21.0.9-2.1.el8.x86_64/bin/java \
  -Dpinpoint.zookeeper.address=127.0.0.1 \
  -Dspring.datasource.hikari.jdbc-url="jdbc:mysql://127.0.0.1:3306/pinpoint?useSSL=false&allowPublicKeyRetrieval=true" \
  -Dspring.datasource.hikari.username=pinpoint_user \
  -Dspring.datasource.hikari.password=admin123 \
-jar pinpoint-collector-4.0.0-exec.jar &pinpoint-webの起動
% cd ~/src/pinpoint-4.0.0/web/target/deploy
% /usr/lib/jvm/java-17-openjdk-17.0.21.0.9-2.1.el8.x86_64/bin/java \
-Dpinpoint.zookeeper.address=127.0.0.1 \
-Dspring.datasource.hikari.jdbc-url="jdbc:mysql://127.0.0.1:3306/pinpoint?useSSL=false&allowPublicKeyRetrieval=true" \
-Dspring.datasource.hikari.username=pinpoint_user \
-Dspring.datasource.hikari.password=admin123 \
-jar pinpoint-web-4.0.0-exec.jar &動作確認用のQuickstart
% cd ~/src/pinpoint-4.0.0/
% java -jar \
-javaagent:agent-module/agent/target/pinpoint-agent-4.0.0/pinpoint-bootstrap-4.0.0.jar \
-Dpinpoint.agentId=test-agent \
-Dpinpoint.applicationName=testApp \
-Dpinpoint.serviceName=DEFAULT \
-Dpinpoint.collector.ip=192.168.1.203 \
-Dpinpoint.collector.grpc.agent.port=9991 \
-Dpinpoint.collector.grpc.stat.port=9991 \
-Dpinpoint.collector.grpc.span.port=9991 \
quickstart/testapp/target/pinpoint-quickstart-testapp-4.0.0.jar上記を起動したのち、以下URLにアクセスし、負荷をかけてグラフを表示させたりすることが出来る。
URL : http://192.168.1.203:8082/
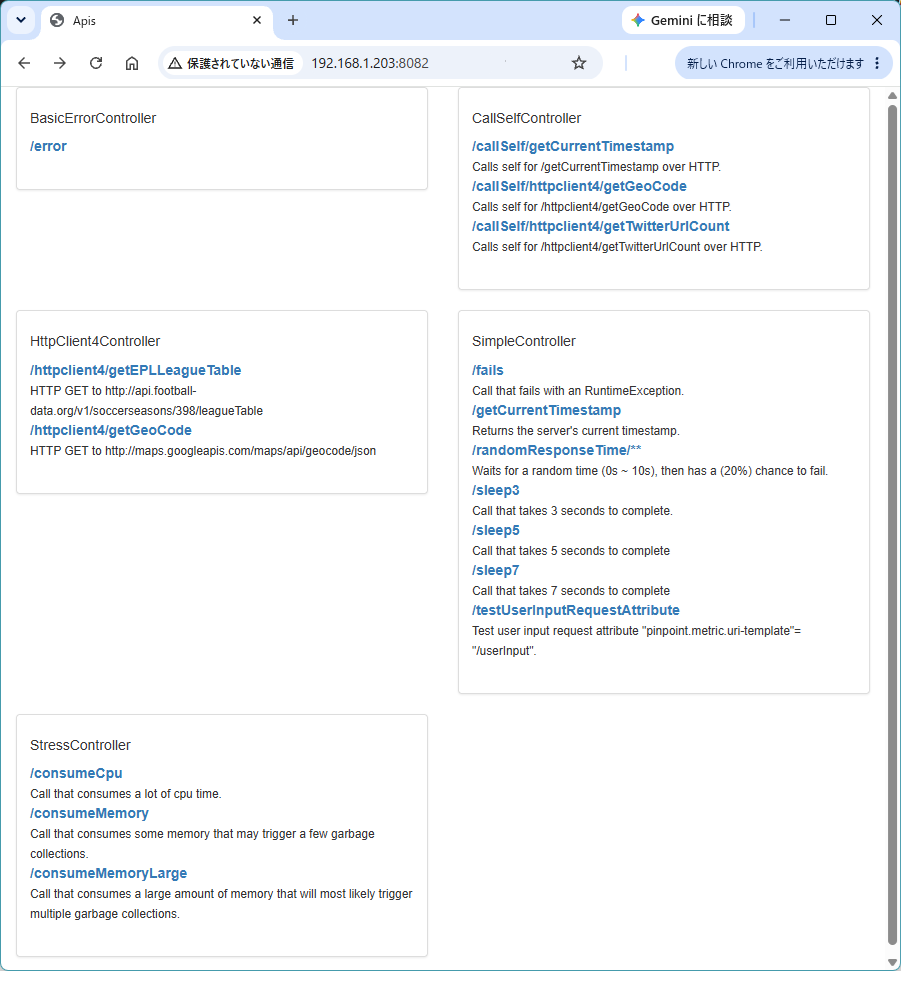
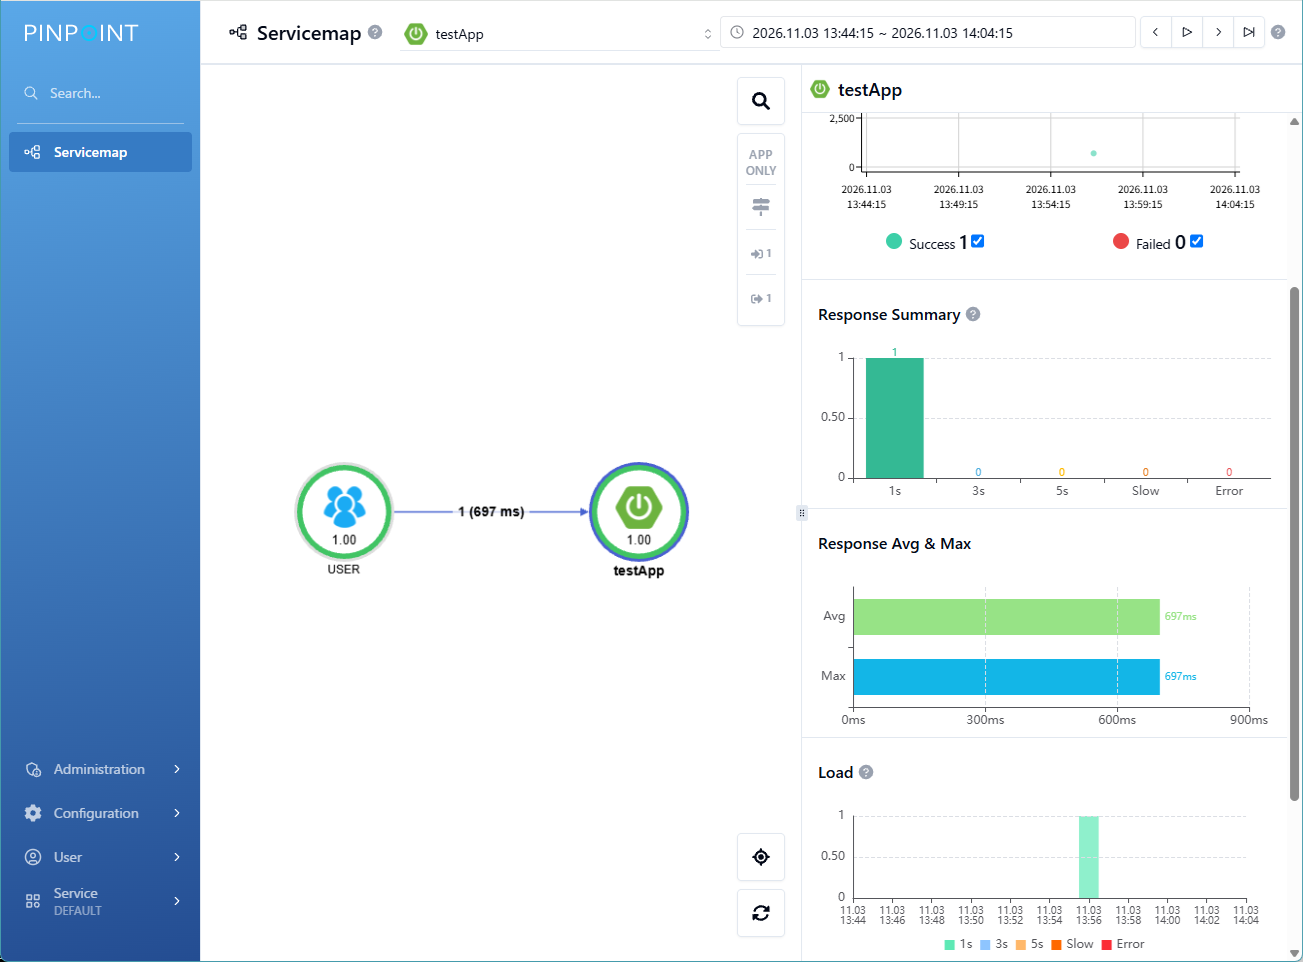
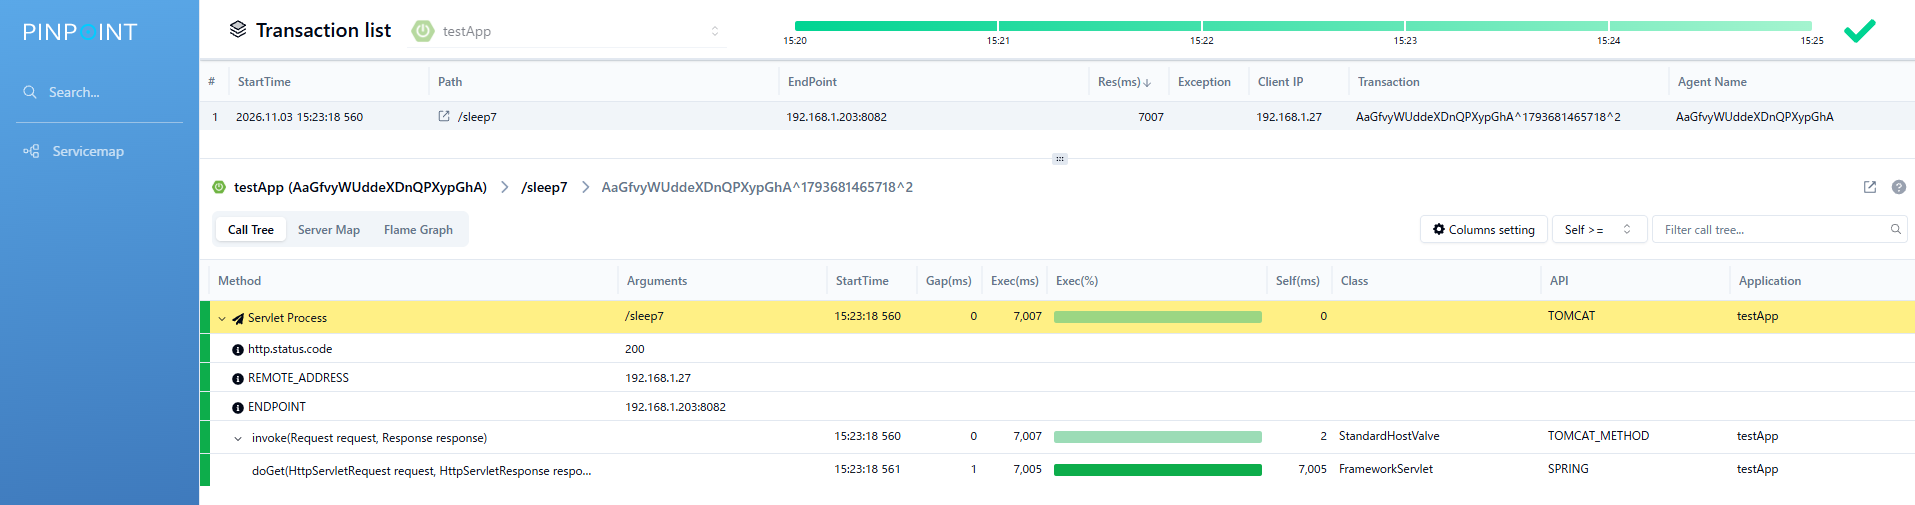
起動一式
HBase
% cd ~/src/hbase-2.6.7/bin/
% ./start-hbase.sh
Kafka
% cd ~/src/kafka_2.13-4.4.0/
% KAFKA_CLUSTER_ID="$(bin/kafka-storage.sh random-uuid)"
% ./bin/kafka-server-start.sh config/server.properties &
MariaDB
% systemctl start mariadb
% systemctl status mariadb
pinpoint-controller
% cd ~/src/pinpoint-4.0.0/collector/target/deploy
% /usr/lib/jvm/java-17-openjdk-17.0.21.0.9-2.1.el8.x86_64/bin/java \
  -Dpinpoint.zookeeper.address=127.0.0.1 \
  -Dspring.datasource.hikari.jdbc-url="jdbc:mysql://127.0.0.1:3306/pinpoint?useSSL=false&allowPublicKeyRetrieval=true" \
  -Dspring.datasource.hikari.username=pinpoint_user \
  -Dspring.datasource.hikari.password=admin123 \
  -jar pinpoint-collector-4.0.0-exec.jar &
pinpoint-web
% cd ~/src/pinpoint-4.0.0/web/target/deploy
% /usr/lib/jvm/java-17-openjdk-17.0.21.0.9-2.1.el8.x86_64/bin/java \
  -Dpinpoint.zookeeper.address=127.0.0.1 \
  -Dspring.datasource.hikari.jdbc-url="jdbc:mysql://127.0.0.1:3306/pinpoint?useSSL=false&allowPublicKeyRetrieval=true" \
  -Dspring.datasource.hikari.username=pinpoint_user \
  -Dspring.datasource.hikari.password=admin123 \
  -jar pinpoint-web-4.0.0-exec.jar &
metric機能追加
metricでは、情報量が多いためHBaseでは処理できないため、Pinotを使うようになった。環境は整えているのでKafkaからPinotへ情報を渡して、WEB-UIで見ることが出来るようにしていきます。
Agent ──(データ)──> Collector ──(一度書き出し)──> Kafka ──> Pinot ──> Web-UI
kafkaでトピックの作成
% ~/src/kafka_2.13-4.4.0/bin/kafka-topics.sh --create --bootstrap-server localhost:9092 --replication-factor 1 --partitions 1 --topic pinpoint-metrics

pinotの起動
% cd ~/src/pinot-1.5.1/
% ./bin/pinot-admin.sh StartController \
  -controllerPort 9000 \
  -zkAddress localhost:2181 \
  -clusterName PinotCluster &
% ./bin/pinot-admin.sh StartBroker \
  -brokerPort 8099 \
  -zkAddress localhost:2181 \
  -clusterName PinotCluster &
% ss -tlpn | grep -E "9000|8099"
LISTEN 0      128                         *:8099             *:*    users:(("java",pid=33301,fd=71))
LISTEN 0      128                         *:9000             *:*    users:(("java",pid=33158,fd=36))

スキーマの登録
% cd ~/src/pinpoint-4.0.0/metric-module/metric/src/main/pinot/
% ~/src/pinot-1.5.1/bin/pinot-admin.sh AddTable \
  -schemaFile pinot-dataType-schema.json \
  -tableConfigFile pinot-dataType-realtime-table.json \
  -exec

% ~/src/pinot-1.5.1/bin/pinot-admin.sh AddTable \
  -schemaFile pinot-double-schema.json \
  -tableConfigFile pinot-double-realtime-table.json \
  -exec

% ~/src/pinot-1.5.1/bin/pinot-admin.sh AddTable \
  -schemaFile pinot-tag-schema.json \
  -tableConfigFile pinot-tag-realtime-table.json \
  -exec

pinpoint-collectorの起動
% cd ~/src/pinpoint-4.0.0/collector/target/deploy
% java \
  -Dpinpoint.zookeeper.address=127.0.0.1 \
  -Dspring.datasource.hikari.jdbc-url="jdbc:mysql://127.0.0.1:3306/pinpoint?useSSL=false&allowPublicKeyRetrieval=true" \
  -Dspring.datasource.hikari.username=pinpoint_user \
  -Dspring.datasource.hikari.password=admin123 \
  -Dpinpoint.modules.metric.enable=true \
  -Dspring.kafka.bootstrap-servers=localhost:9092 \
  -jar pinpoint-collector-4.0.0-exec.jar &

pinpoint-webの起動
% cd ~/src/pinpoint-4.0.0/web/target/deploy
% java \
  -Dpinpoint.zookeeper.address=127.0.0.1 \
  -Dspring.datasource.hikari.jdbc-url="jdbc:mysql://127.0.0.1:3306/pinpoint?useSSL=false&allowPublicKeyRetrieval=true" \
  -Dspring.datasource.hikari.username=pinpoint_user \
  -Dspring.datasource.hikari.password=admin123 \
  -Dpinpoint.modules.metric.enable=true \
  -Dpinpoint.pinot.jdbc.url="jdbc:pinpoint://localhost:8099" \
-jar pinpoint-web-4.0.0-exec.jar &metricを含めた起動一式
HBase
% cd ~/src/hbase-2.6.7/bin/
% ./start-hbase.sh

Kafka
% cd ~/src/kafka_2.13-4.4.0/
% KAFKA_CLUSTER_ID="$(bin/kafka-storage.sh random-uuid)"
% ./bin/kafka-server-start.sh config/server.properties &

MariaDB
% systemctl start mariadb
% systemctl status mariadb

pinotの起動
% cd ~/src/pinot-1.5.1/
% ./bin/pinot-admin.sh StartController \
  -controllerPort 9000 \
  -zkAddress localhost:2181 \
  -clusterName PinotCluster &
% ./bin/pinot-admin.sh StartBroker \
  -brokerPort 8099 \
  -zkAddress localhost:2181 \
  -clusterName PinotCluster &

pinpoint-collectorの起動
% cd ~/src/pinpoint-4.0.0/collector/target/deploy
% java \
  -Dpinpoint.zookeeper.address=127.0.0.1 \
  -Dspring.datasource.hikari.jdbc-url="jdbc:mysql://127.0.0.1:3306/pinpoint?useSSL=false&allowPublicKeyRetrieval=true" \
  -Dspring.datasource.hikari.username=pinpoint_user \
  -Dspring.datasource.hikari.password=admin123 \
  -Dpinpoint.modules.metric.enable=true \
  -Dspring.kafka.bootstrap-servers=localhost:9092 \
  -jar pinpoint-collector-4.0.0-exec.jar &

pinpoint-webの起動
% cd ~/src/pinpoint-4.0.0/web/target/deploy
% java \
  -Dpinpoint.zookeeper.address=127.0.0.1 \
  -Dspring.datasource.hikari.jdbc-url="jdbc:mysql://127.0.0.1:3306/pinpoint?useSSL=false&allowPublicKeyRetrieval=true" \
  -Dspring.datasource.hikari.username=pinpoint_user \
  -Dspring.datasource.hikari.password=admin123 \
  -Dpinpoint.modules.metric.enable=true \
  -Dpinpoint.pinot.jdbc.url="jdbc:pinpoint://localhost:8099" \
  -jar pinpoint-web-4.0.0-exec.jar &